Assista ao vídeo ou siga os passos descritos abaixo.
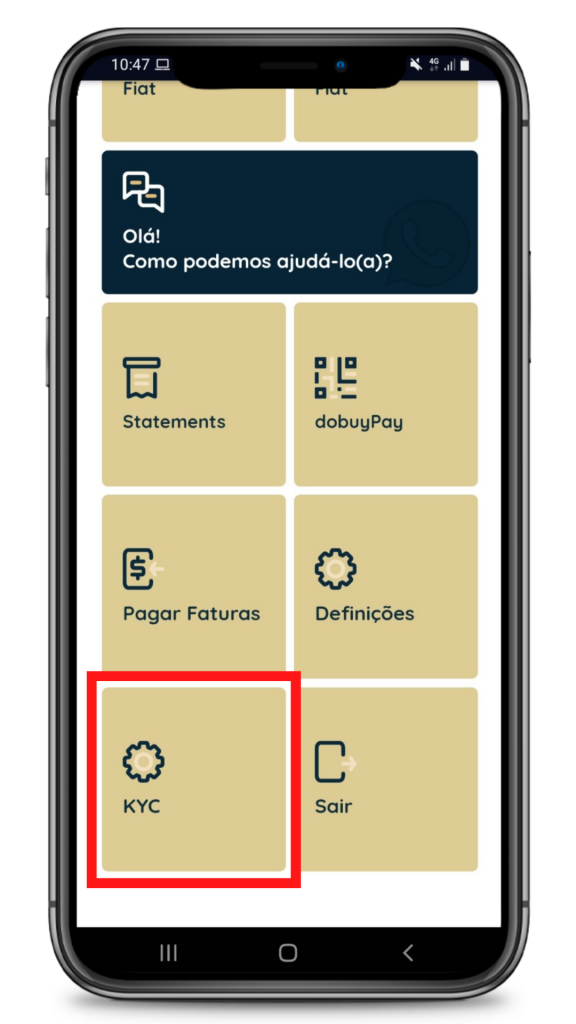
1.1 On the home screen, look for KYC.
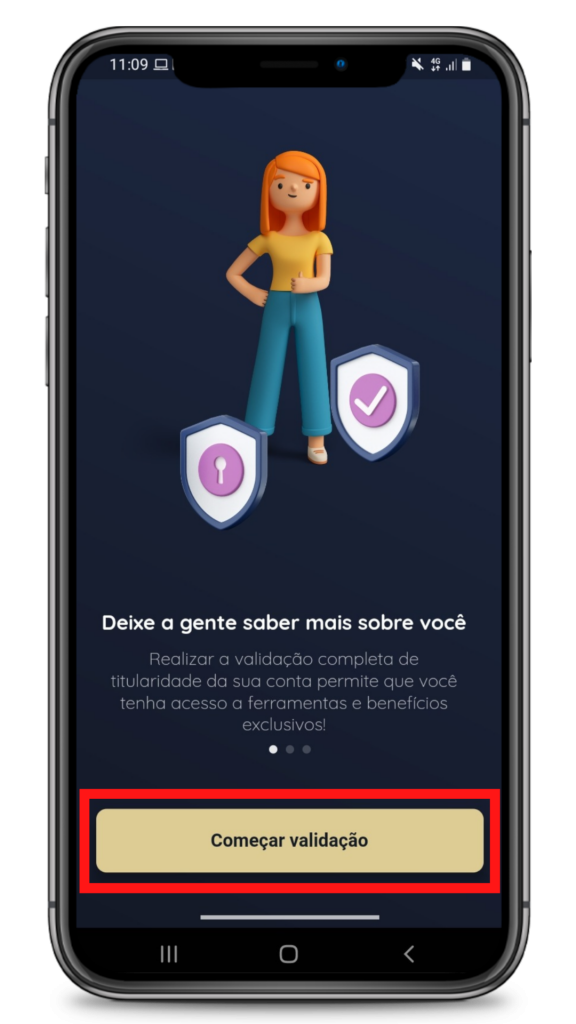
1.2 Read the pre-validation messages and tap “Start Validation”.
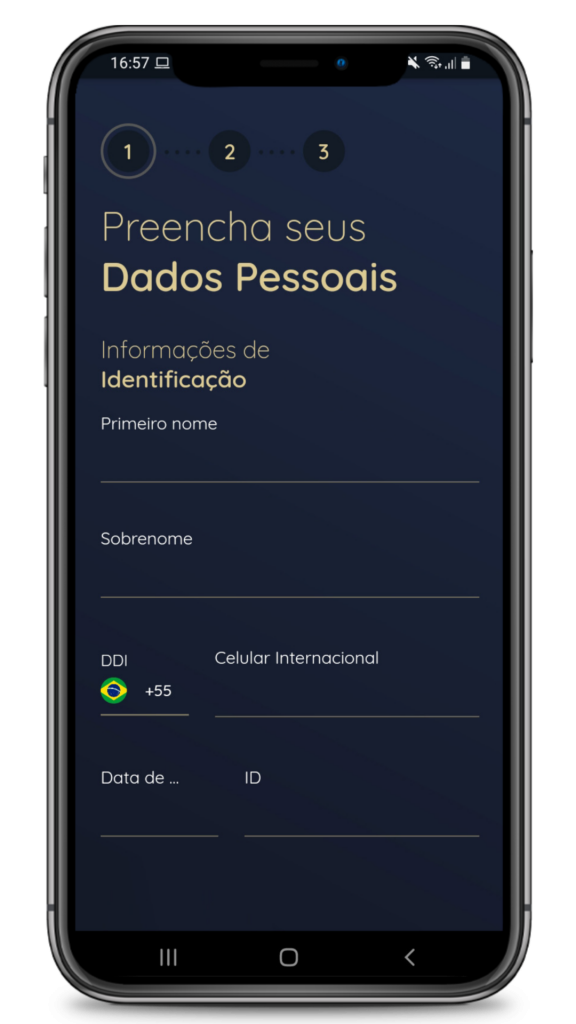
1.3 Fill in all your identifying information:
A) First name
B) Last name
C) Cell phone
D) Date of birth
E) Identity document number (ID.)
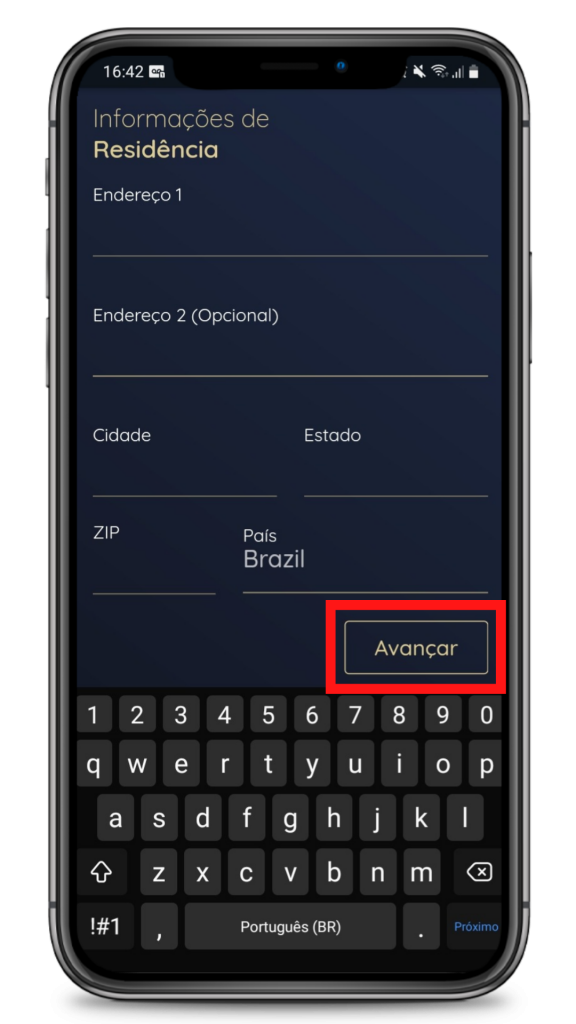
1.4 Fill in all your Residence information:
A) Address 1
B) Address 2 (Optional)
C) City
D) State
E) ZIP
F) Country
1.5 With all required data filled in, tap “Next”.
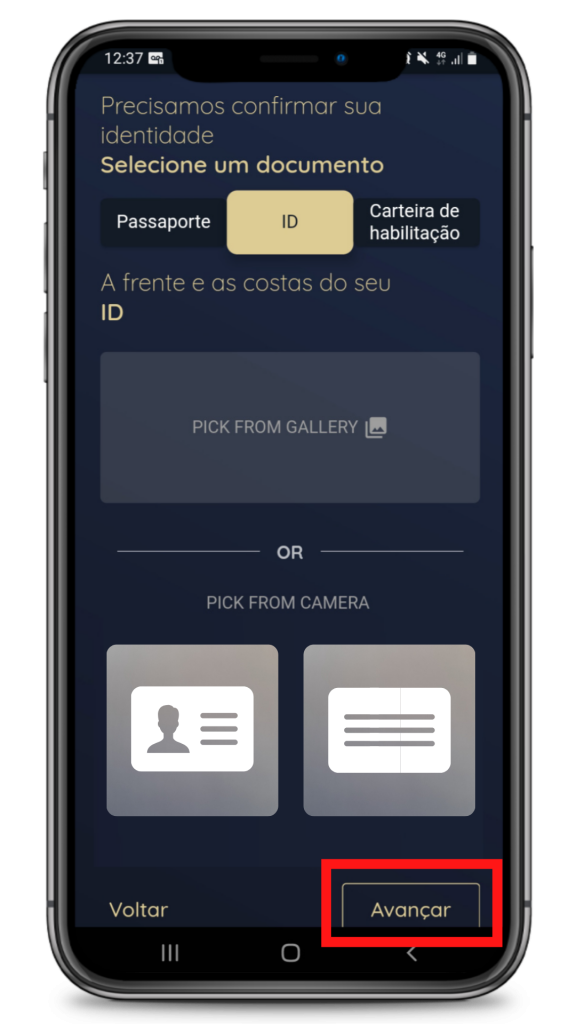
2.1 To send the image of your ID document, start by choosing which document you will use:
A) PassportB) ID orC) Driver’s License
2.2 To attach the image of your document in the app, choose:
A) “Pick from gallery”To choose an image from your document that is already in your gallery.
or
B) “Pick from Camera”To take a new picture of your document with your smartphone camera.
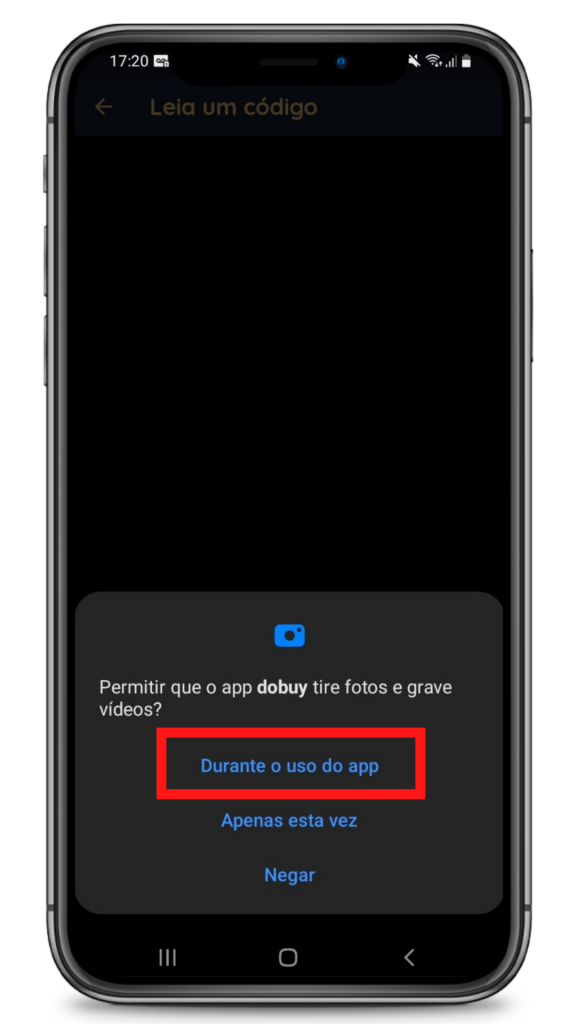
2.3 In both options, allow the App access to your device:
2.4 Select the image from the gallery or take the new photo.
3.1 With the document image attached to the App, tap the “Next” button.
Note: If you have chosen the ID option, you will need to send two images. One of the front of the document and one of the back.
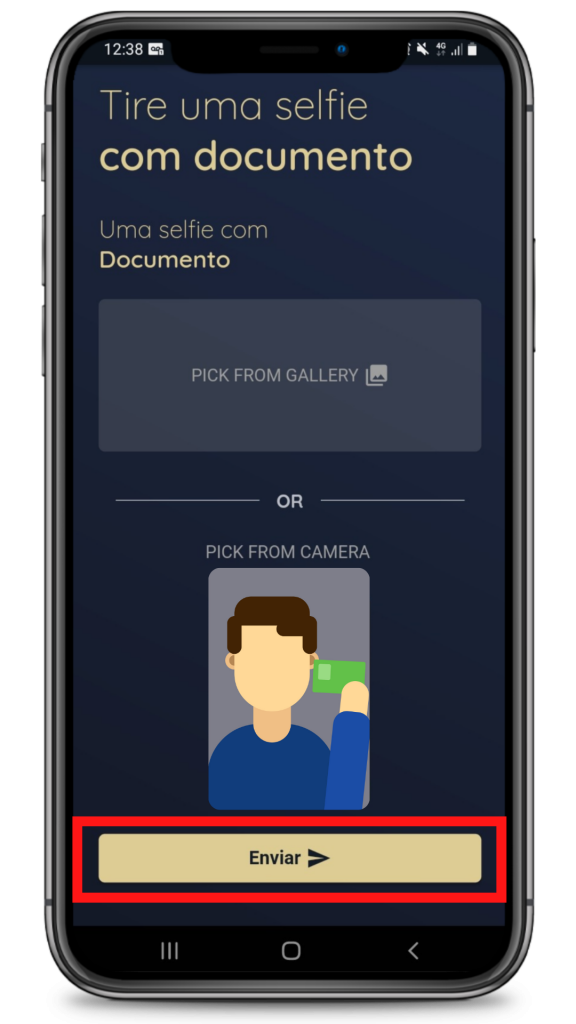
To validate your account, we need you to submit a photo of your face along with your document.
3.1 To attach your photo holding the document in the app, choose:
A) “Pick from gallery”To choose a photo of your face holding the document that is already in your gallery.
ou
B) “Pick from Camera”To take a new picture of your face by holding your document with your Smartphone camera.
5.1 With your photo holding the document attached in the App, tap the “Submit” button.